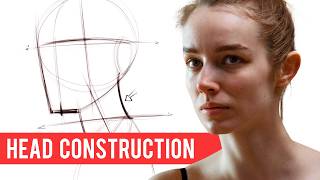
How I Paint Realistic Portrait | Step-by-step DEMO, by 𝐑 𝐎 𝐒 𝐓 𝐘 𝐒 𝐋 𝐀 𝐕 𝐌 𝐀 𝐋 𝐘 𝐒 𝐇 on YouTube. 18 min 51 s.
- Video length
- 18 min 51 s
- Time to do it
- 3 hours
- Difficulty
- Medium
- Steps
- 9
What you need
Steps
Set up your canvas, reference photo and palette. Lay out skin tones plus white, black and earth colours, and keep solvent and a rag within reach.
Block in the underpainting with thin, lean paint. Map the head shape, shadow areas and main features without detail, then let it dry slightly.
Paint the eyes first. Build the white, iris and pupil, then add the upper lid shadow and a small highlight to make them look wet.
Move to the nose. Paint the shadow under the tip and along one side, then soften the edges so the form turns rather than sits flat.
Paint the lips with a mid tone, then add a darker line where they meet and a lighter edge on the lower lip for volume.
Paint the ear with simple shadow shapes. Keep it softer and less detailed than the eyes so it sits back in the face.
Fill the background with a thin, even tone. Work around the hair outline and keep the edges clean.
Paint the hair in masses first, then add strands and highlights. Follow the direction the hair grows and keep the edges loose.
Check the whole portrait against your reference. Adjust values, soften hard edges and add final highlights, then leave it to dry.
Tips and common mistakes
Keep early layers thin and add thicker paint only in later layers so the surface does not crack.
Squint at your reference to judge light and dark shapes before worrying about detail.
Work with good ventilation and keep solvent away from your skin and eyes.
Questions
Do I need oil paints, or can I use acrylics?
The same order of work applies to acrylics. Acrylics dry faster, so you may need to work quicker on the underpainting and blending.
How long should the underpainting dry?
Let it dry until it is touch dry before adding thicker paint. Thin layers dry faster, so keep the first pass lean.
What if my portrait looks flat?
Check your values first. Stronger shadows and a few well-placed highlights usually fix a flat look more than extra detail.
This guide was drafted from the video's details and general task knowledge. It has not been checked against the full video. Check the video and relevant product instructions before following a procedure. Report a correction.