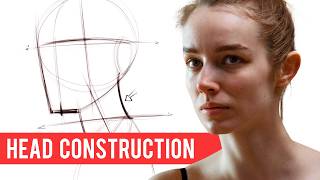
How to Get face drawing Proportions Right for beginners | Portrait Drawing Tutorial, by findpea drawing on YouTube. 30 min 28 s.
- Video length
- 30 min 28 s
- Time to do it
- 1 hour
- Difficulty
- Medium
- Steps
- 9
What you need
Steps
Pick a clear reference photo with even lighting and the face turned only slightly. Print it or keep it on a screen beside your paper so you can compare shapes as you draw.
Sketch the overall head outline lightly. Start with a simple oval or egg shape, then narrow the jaw and mark where the chin sits.
Draw a vertical centre line down the face and a horizontal line across the eye level. These guide lines keep the features lined up and symmetrical.
Mark the proportions: eyes sit roughly halfway down the head, the nose base about halfway between eyes and chin, and the mouth about a third below the nose.
Block in the nose with simple shapes first, like a wedge for the bridge and a soft triangle for the tip. Add the nostrils and shadow under the tip.
Place the mouth by drawing the centre line between the lips, then the upper and lower lip curves. Keep the corners level with the pupils above.
Draw the eyes as almond shapes with the iris partly covered by the upper lid. Add the pupil, highlight and a light crease above each eye.
Deepen the shadows under the brow, beside the nose, under the lower lip and along the jaw to build the facial structure. Keep the light side of the face clean.
Sketch the hair last, starting with the overall hairline and big shapes. Add strands in the direction the hair grows, leaving gaps for highlights.
Tips and common mistakes
Keep your first lines very light so you can erase and adjust proportions without smudging the paper.
Check your drawing in a mirror or turn the photo upside down to spot features that are too high, low or wide.
Compare distances rather than copying outlines: measure the gap between the eyes and match it to the nose width.
Questions
Do I need the Loomis method to draw a face?
No. The Loomis method is one way to build the head, but you can start with a simple oval and guide lines for the eyes, nose and mouth. The key is checking proportions against your reference.
How long should I spend on a beginner portrait?
Plan around an hour for a first sketch. Most of that time goes on the eyes and shading, so keep the early outline quick and light.
What pencil should I use for shading?
An HB pencil works for the outline and a 2B or 4B gives darker shadows. Build shade in light layers instead of pressing hard straight away.
This guide was drafted from the video's details and general task knowledge. It has not been checked against the full video. Check the video and relevant product instructions before following a procedure. Report a correction.