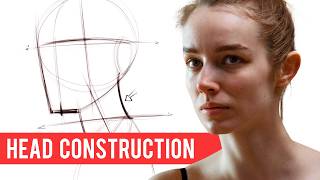
HOW TO DRAW Head Side View | Easy Beginner Proportion Tutorial, by Lazy Arts on YouTube. 9 min 52 s.
- Video length
- 9 min 52 s
- Time to do it
- 20 minutes
- Difficulty
- Easy
- Steps
- 8
What you need
Steps
Draw a circle for the cranium. Keep the line light so you can adjust it later. This circle sets the size of the skull.
Add a vertical line down the front of the circle. This marks the face plane and helps you place the features.
Draw a horizontal line through the middle of the circle. The eyes sit on this line in a side view.
Mark the brow line just below the eye line and the nose base about halfway down the face.
Sketch the jaw from the bottom of the circle forward to the chin. Keep the angle soft and rounded.
Place the ear between the brow line and the nose base, slightly behind the middle of the head.
Draw the nose profile as a small triangle at the front, then add the lips below it.
Check the proportions, erase the guide lines and darken the final outline.
Tips and common mistakes
Keep your first lines light so mistakes are easy to erase.
The ear usually lines up between the eyebrow and the base of the nose.
Draw the whole head shape before adding any details.
Practice the same sketch several times to build muscle memory.
Questions
Do I need special pencils?
No. A normal HB or 2B pencil and a soft eraser are enough. The video uses a Tombow Mono 100 pencil, but any pencil works.
How long should the head be?
A common guide is that the head is about one and a half times as tall as the circle, with the chin sitting below it.
Why does my side profile look flat?
Check that the nose, lips and chin step forward from the face line. Small changes in these angles make the profile look real.
This guide was drafted from the video's details and general task knowledge. It has not been checked against the full video. Check the video and relevant product instructions before following a procedure. Report a correction.