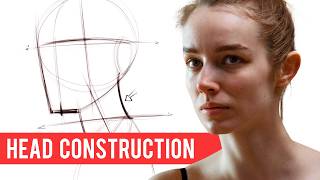
Head Proportions for Beginners | Draw Any Face You Want!, by Cameron Suter Art on YouTube. 8 min 36 s.
- Video length
- 8 min 36 s
- Time to do it
- 20 minutes
- Difficulty
- Easy
- Steps
- 9
What you need
Steps
Draw a circle for the cranium. Keep your lines light so you can adjust them later. This sphere is the top and back of the skull.
Measure the sphere and mark its centre. Use that centre to judge where the face features will sit before you add anything else.
Turn the circle into an ellipse to set the head angle. For a 3/4 view, the ellipse narrows on the side turning away from you.
Add the centre line down the front of the face. It curves with the form and marks where the nose and mouth will line up.
Place the chin on the centre line below the sphere. The distance from the brow to the chin should roughly match the sphere's height.
Draw the jaw from the chin up to each side of the head. Keep the near side wider and the far side shorter to show the turn.
Mark the cheekbones on both sides of the face. They sit around the level of the bottom of the ellipse.
Add the neck from the base of the jaw and skull. The neck is a cylinder, not a straight tube, and sits behind the jaw line.
Check your proportions, then darken the lines you want to keep. Erase the construction lines only after the shape looks right.
Tips and common mistakes
Draw everything lightly at first so mistakes are easy to erase.
Compare the width of the head to its height before adding features.
Keep the far side of the face slightly narrower in a 3/4 view.
Practise the sphere and ellipse several times before drawing the full head.
Questions
Do I need special drawing paper?
No. Any plain paper and a normal pencil work for this exercise. A sketchbook just keeps your practice pages together.
Why start with a sphere instead of the eyes?
The sphere sets the size and angle of the whole skull. Features placed after it stay in proportion instead of drifting.
How long should I practise this?
Short daily sessions of 10 to 15 minutes work better than one long session. Repeat the same 3/4 angle until it feels natural.
This guide was drafted from the video's details and general task knowledge. It has not been checked against the full video. Check the video and relevant product instructions before following a procedure. Report a correction.