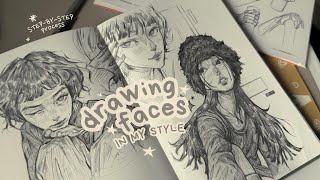
How to draw a face using LOOMIS METHOD!! (Full Voice-Over Tutorial), by One Pencil drawing on YouTube. 25 min 51 s.
- Video length
- 25 min 51 s
- Time to do it
- 30 minutes
- Difficulty
- Easy
- Steps
- 9
What you need
Steps
Draw a circle for the cranium. Keep the line light so you can adjust it later. This circle is the top and back of the skull.
Draw a vertical line down the middle of the circle. This is the center line of the face. It helps you keep both sides balanced.
Flatten the sides of the circle into two vertical planes. These planes are where the ears sit and the head turns.
Mark the brow line halfway down the head, then the nose line halfway between brow and chin. Add the chin line below the nose line.
Draw the jaw from the bottom of each side plane down to the chin. Curve it inward so the jaw narrows toward the chin.
Place the eyes on the brow line. Leave one eye width between them, and one eye width to each side of the face.
Draw the nose from the nose line up to the brow line. Set the mouth about one third of the way down from the nose to the chin.
Add the ears between the brow line and the nose line. Then sketch the hairline and refine the outline of the head.
Erase the construction lines and darken the features you want to keep. Check the proportions before adding shading.
Tips and common mistakes
Keep every construction line light until the proportions look right, then commit with a darker pencil.
The eyes sit halfway down the head, not near the top, which is the most common beginner mistake.
Draw the same head from the front, side and three-quarter view to test whether your structure holds up.
Questions
Do I need special drawing paper for the Loomis method?
No. Any plain paper and a normal pencil work fine. A slightly heavier paper helps if you plan to erase a lot.
How long does it take to learn the Loomis method?
Expect a few practice heads before the proportions feel natural. Drawing one head a day for a couple of weeks builds real speed.
Can I use the Loomis method for a side view?
Yes. The same sphere and side planes apply, but the center line moves to the profile edge and the features shift forward.
This guide was drafted from the video's details and general task knowledge. It has not been checked against the full video. Check the video and relevant product instructions before following a procedure. Report a correction.