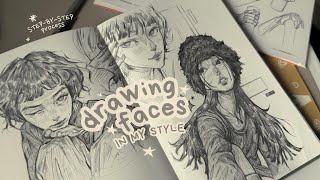
How to DRAW FACES - In your own Style [Front + Sideview] | DrawlikeaSir, by Draw like a Sir on YouTube. 12 min 32 s.
- Video length
- 12 min 32 s
- Time to do it
- 30 minutes
- Difficulty
- Easy
- Steps
- 9
What you need
Steps
Draw a light circle for the top of the skull. This is the cranium, and it sets the width of the head. Keep the line soft so you can erase it later.
Add a vertical line down the middle of the circle. This center line keeps the eyes, nose and mouth lined up. Draw it lightly.
Mark the eye line halfway down the head, not near the top. Many beginners place the eyes too high. Split the lower half into thirds for the nose and mouth.
Shape the jaw and chin from the sides of the circle down to a rounded point. Make the jaw narrower than the skull. Erase the guide lines you no longer need.
Place the eyes one eye-width apart on the eye line. Draw the nose at the second third and the mouth above the chin line. Add the ears between the eye line and nose line.
Draw the front view features in simple shapes first: almond eyes, a small wedge nose and a soft mouth line. Refine the outlines once the placement looks right.
For the side view, draw the same circle and add a profile line for the forehead, nose and chin. The ear sits behind the middle of the head.
Place the eye near the front of the profile and the nose tip ahead of the face line. Check that the chin lines up under the nose.
Erase the construction lines and darken the final outlines. Add hair and small details only after the proportions look correct.
Tips and common mistakes
Keep all guide lines light so they erase cleanly.
Check the eye line first, since eyes placed too high make the face look wrong.
Draw the same head shape several times before adding details.
Use a mirror or flip your paper to spot lopsided features.
Questions
Do I need special art supplies?
No. A normal pencil, paper and an eraser are enough. A ruler helps with the guide lines but is optional.
How long should I practice before it looks good?
Expect a few short sessions. Repeat the proportion steps until the placement feels natural, then add details.
Can I use this method for any art style?
Yes. The proportions give you a base, and you can stretch or shrink the features to match your own style.
This guide was drafted from the video's details and general task knowledge. It has not been checked against the full video. Check the video and relevant product instructions before following a procedure. Report a correction.