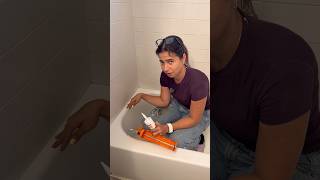
How to Apply Silicone to Get a Pro Finish, by Proper DIY on YouTube. 11 min 7 s.
- Video length
- 11 min 7 s
- Time to do it
- 1 hour plus 24 hours curing
- Difficulty
- Easy
- Steps
- 10
What you need
Steps
Cut away the old sealant with a sharp knife and lift it out with a scraper. Work along the joint in short sections so you do not gouge the bath or tiles.
Soften any stubborn leftovers with a chemical sealant remover, following the label, then scrape again until the joint is completely clear.
Clean the joint and the tile edges with a cloth and methylated spirit to strip soap scum and grease. Let the area dry completely before you start.
Fill the bath with water before sealing. The weight opens the gap to its working width, so the cured bead will not tear when the bath is used.
Run masking tape along both sides of the joint, leaving a gap about 6mm wide. Press the tape edges down firmly so silicone cannot creep underneath.
Cut the nozzle at 45 degrees to roughly the width of the gap. Load the cartridge into the gun and squeeze until silicone reaches the tip.
Run a steady bead along the joint, keeping the nozzle at a constant angle and pushing the gun away from you rather than dragging it.
Smooth the bead in one continuous pass with a silicone tool or a wet finger. Wipe the tool between passes instead of pressing harder.
Peel the tape off straight away while the silicone is still wet, pulling it back on itself at a low angle.
Leave the bead to skin over, then let it cure fully, usually 24 hours, before draining the bath or letting it get wet.
Tips and common mistakes
Buy a drip-free caulking gun and a quality sanitary silicone, as cheap guns make an even bead much harder.
Do not over-smooth the bead or you will drag silicone onto the tiles and leave a smeared edge.
Work in sections of about a metre so the silicone never skins over before you smooth it.
Keep a damp cloth and a dry cloth nearby to clean your fingers and tool as you go.
Questions
How long before the bath can be used?
Leave the silicone for around 24 hours before getting it wet or running a bath. Cool, damp rooms can push that closer to 48 hours.
Should I fill the bath with water before sealing?
Yes, filling the bath first means the joint is sealed at its widest. Drain it only after the silicone has cured.
How do I get a smooth finish without a silicone tool?
A wet finger or the rounded corner of a plastic lolly stick works well. Spray the bead lightly with soapy water first to stop it sticking.
This guide was drafted from the video's details and general task knowledge. It has not been checked against the full video. Check the video and relevant product instructions before following a procedure. Report a correction.