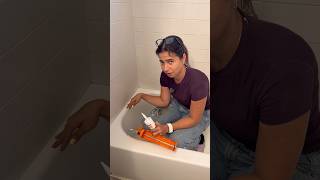
How to Remove and Replace Mouldy Silicone around a Bathtub, by SC_LDNsealants on YouTube. 2 min 30 s.
- Video length
- 2 min 30 s
- Time to do it
- 1 to 2 hours plus drying time
- Difficulty
- Easy
- Steps
- 8
What you need
Steps
Run a sharp craft knife along both edges of the old silicone, keeping the blade flat against the tile and tub so you do not scratch them.
Pull the loosened silicone away in long strips. Use a silicone remover tool or the knife for any stubborn bits left in the corner.
Scrape off all residue and wipe the joint with rubbing alcohol or a silicone cleaner. The surface must be dry, clean and free of grease.
Press masking tape along the tile and the tub edge, leaving a gap the width you want the new bead to be.
Load the cartridge into the caulking gun and cut the nozzle at a 45 degree angle to match the joint width.
Push the bead steadily along the joint, keeping the nozzle tip in the silicone. Fill the gap fully in one pass.
Smooth the bead with a wet finger or a silicone smoothing tool, then peel the tape off straight away while the sealant is still wet.
Leave the sealant to cure for the time on the cartridge, usually 24 hours, and keep the tub dry until then.
Tips and common mistakes
Never seal over old silicone. New sealant will not stick and mould returns fast.
Fill the bath with water before sealing if the tub is acrylic, then drain it after curing so the joint does not stretch.
Work in one continuous pass. Stopping and starting leaves lumps you have to smooth out.
Choose a sanitary grade silicone labelled mould resistant for wet areas.
Questions
Can I just put new silicone over the old?
No. New sealant will not bond to old silicone and water gets trapped underneath. Always cut the old bead out completely first.
How long before I can use the bath?
Most silicone needs about 24 hours to cure. Check your cartridge and keep the area dry for that time.
What if the mould is behind the tiles?
If the grout or board behind is soft or crumbly, the problem is deeper than the seal. Get it checked before resealing.
This guide was drafted from the video's details and general task knowledge. It has not been checked against the full video. Check the video and relevant product instructions before following a procedure. Report a correction.