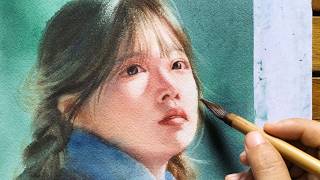
Portrait Art Tutorial: Transforming A Minimalist Pretty Portrait To An Edgy Fashionista, by Head Trip Creations on YouTube. 21 min 18 s.
- Video length
- 21 min 18 s
- Time to do it
- 1 hour 30 minutes
- Difficulty
- Medium
- Steps
- 9
What you need
Steps
Sketch the portrait on 9 by 12 inch, 140 lb watercolor paper with a No. 2 pencil. Keep the features simple and leave space around the head for collage and marks.
Paint the face with a blend of watercolor skin tones. Start with light washes and let each layer dry before adding deeper shadows.
Brush on thin instant coffee as a watercolor wash to warm the skin. Keep it light so the underlying skin tones still show.
Lift highlights with white acrylic and deepen the hair and shadows with heavy body black acrylic. Use a fineliner brush for tight areas.
Place a circles stencil over the background. Dab through it with light orange PanPastel or an acrylic marker and let the shapes overlap the edges.
Draw back into the face with a black gel pen, Sharpie, Stabilo All pencil and brown Prismacolor pencil. Change line weight for an edgy look.
Cut collage pieces with a razor blade on a cutting mat, away from your fingers. Glue them with PVC craft glue around the face, not across it.
Write loose asemic lines with black hot glue. Work steadily and let the glue cool before you touch it.
Finish with orange and pink Inktense blocks and a light brown oil pastel stick. Blend the edges with a damp brush.
Tips and common mistakes
Test instant coffee on scrap paper first, because it stains strongly and is hard to lift.
Keep collage pieces off the main features so the face still reads clearly.
Let each watercolor and acrylic layer dry fully before adding pen lines or glue.
Cut with a sharp blade on a mat and keep your fingers behind the blade.
Questions
Can I skip the instant coffee?
Yes. Use a thin warm brown watercolor wash instead. The coffee adds a stained, vintage tone that is hard to match exactly.
Do I need every supply listed?
No. Start with watercolor, a black pen, one pastel and some collage paper. Add acrylic markers, stencils and hot glue once the base portrait works.
How do I stop the portrait looking muddy?
Keep washes thin and dry each layer before adding the next. Save black acrylic, heavy lines and hot glue for the final stages.
This guide was drafted from the video's details and general task knowledge. It has not been checked against the full video. Check the video and relevant product instructions before following a procedure. Report a correction.