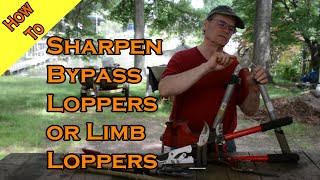
How to Sharpen Pruning Shears Like a PRO! (Step-by-Step Guide), by knivesandtools on YouTube. 2 min 48 s.
- Video length
- 2 min 48 s
- Time to do it
- 20 minutes
- Difficulty
- Easy
- Steps
- 7
What you need
Steps
Check that your shears are bypass type, where one blade slices past the other. Anvil shears cut against a flat bed and need a different approach.
Find the bevel angle on the cutting blade and keep the stone flat against that same angle as you work. Match the existing shape rather than making a new one.
Clean dirt and sap off the blade with a cloth or brush, then look for nicks and chips. Small nicks come out with sharpening, deep ones need more work.
Lubricate the coarse stone with oil or water, then push the blade along the stone at the bevel angle. Work the full length of the edge in even strokes.
Repeat on the fine stone to polish the edge and remove the scratches from the coarse grit. Keep the same angle throughout.
Turn the blade over and lightly run the fine stone flat along the back to remove the burr. A few passes are enough, do not create a new bevel.
Wipe off the grit, add a drop of oil to the pivot bolt and open and close the shears a few times. Check the cut on a thin branch.
Tips and common mistakes
Keep the stone at the original bevel angle, a steeper angle will blunt the blade faster.
Sharpen only the bevelled side and just remove the burr on the flat back, or the blades will not meet properly.
Clean and oil the pivot after every few uses so the blades close smoothly and stay aligned.
Questions
Can I sharpen pruning shears with a file instead of a stone?
Yes, a fine metal file works for a quick touch up, but a stone gives a smoother, longer lasting edge. Use the file only when the blade has small nicks.
How often should I sharpen my shears?
Sharpen when cuts start to look crushed or the blade slips on stems. For regular garden use that is often once or twice a season.
Do I need to take the shears apart?
Not always. You can sharpen most bypass shears with the blades closed or slightly open, but removing the blade makes it easier to keep a steady angle.
This guide was drafted from the video's details and general task knowledge. It has not been checked against the full video. Check the video and relevant product instructions before following a procedure. Report a correction.