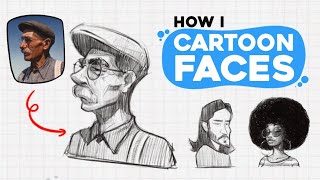
Tips To DRAW PERFECT FACES like these 10 Artists!, by RiceBrush on YouTube. 18 min 13 s.
- Video length
- 18 min 13 s
- Time to do it
- 30 minutes
- Difficulty
- Easy
- Steps
- 10
What you need
Steps
Draw a circle for the cranium, then add a tapering shape below it for the jaw and chin. The head is a ball with a flatter front plane, not an oval.
Draw a vertical line down the middle of the head. This centreline keeps the nose, mouth and chin stacked, even when the head turns slightly.
Draw a horizontal line halfway down the head. That is the eye line. Eyes sit roughly at the midpoint of the skull, not near the top.
Space the eyes about one eye-width apart. A front-facing head is roughly five eye-widths wide, which stops you drawing eyes too close together.
Mark the base of the nose halfway between the eye line and the chin. Mark the mouth line halfway between the nose base and the chin.
Place the ears between the eye line and the nose base, then check the profile from the side. Ears sit further back than most beginners draw them.
Once the proportions hold up, start stylising. Exaggerate the eyes, shorten the nose or stretch the jaw, and keep the underlying construction the same.
Sketch neutral, smiling, angry and surprised versions on the same head. Watch how the brows, eyelids and mouth corners move together.
Break the symmetry slightly. Raise one eyebrow, tilt one mouth corner or make one eye a touch smaller, so the face stops looking mirrored and stiff.
Flip your canvas or hold the sketch to a mirror to spot tilted eye lines and lopsided jaws. Fix the big shapes before adding detail.
Tips and common mistakes
Draw the whole head lightly first and only commit to features once the eye line and centreline look level.
Keep a folder of reference photos so you compare against real faces instead of other drawings.
Five quick 5-minute heads teach you more than one heavily rendered portrait.
Copying a specific artist's style is fine for practice, but credit them and avoid passing the style off as your own.
Questions
How far apart should the eyes be?
Leave about one eye-width of space between them. If the eyes feel too close, the head usually needs to be wider rather than the eyes moved outward.
Where do the ears go?
The top of the ear lines up near the eyebrow and the bottom near the base of the nose. On a side view they sit behind the midpoint of the head.
Should I learn realistic proportions before stylising?
Yes, learn the basic construction first. Stylisation works best when you deliberately bend rules you already understand.
This guide was drafted from the video's details and general task knowledge. It has not been checked against the full video. Check the video and relevant product instructions before following a procedure. Report a correction.