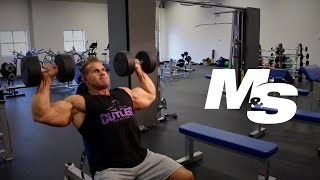
How to: Standing DB Shoulder Press for Physique Development, by Physique Development on YouTube. 2 min 52 s.
- Video length
- 2 min 52 s
- Time to do it
- 10 minutes
- Difficulty
- Easy
- Steps
- 8
What you need
Steps
Pick a pair of dumbbells you can press for 8 to 12 clean reps. If you have to lean back to get them up, they are too heavy.
Stand with feet about shoulder-width apart, knees soft, glutes squeezed and abs braced. Keep your ribs down so your lower back stays neutral.
Bring the dumbbells to shoulder height, palms facing forward. Curl them up one at a time from your thighs, or take them from a rack.
Set your elbows just under your wrists and slightly in front of your body, roughly 45 degrees from your ribs.
Press both dumbbells straight up until your arms are locked overhead. Keep your wrists stacked over your elbows the whole way.
Finish with the dumbbells over your shoulders, biceps near your ears. Do not clank them together at the top.
Lower the dumbbells under control back to shoulder height. Take about two seconds on the way down and keep the elbows tucked.
Do 3 to 4 sets of 8 to 12 reps, resting 60 to 90 seconds between sets. Stop the set when your form starts to break.
Tips and common mistakes
If your lower back arches, the weight is too heavy or your core is not braced, so drop a size.
Do not press the dumbbells out in front of your face. Keep them stacked over your shoulders.
Control the lowering phase instead of letting the dumbbells drop, since that is where most of the muscle work happens.
Questions
Should I stand or sit for a dumbbell shoulder press?
Standing makes your core and legs work to keep you stable, so you usually press a little less weight. Seated pressing is easier to control if you are new to the movement.
How heavy should the dumbbells be?
Light enough that you can press overhead without leaning back or arching your lower back. Build up the weight slowly over a few weeks.
Can I do this at home without a bench?
Yes. You only need dumbbells and space above your head. Curl them up from your thighs one arm at a time to get into the starting position.
This guide was drafted from the video's details and general task knowledge. It has not been checked against the full video. Check the video and relevant product instructions before following a procedure. Report a correction.